This page looks pretty crude right now. I'll have something proper in the future if time allows. My aim here is to record my construction steps and costs and eventual reef-keeping successes and failures when I'm set to go. For the record, I have no previous woodworking, plumbing, electrical or salt-water experience at this point. Everything you see is brought to you by Diet Pepsi and music from the 80's. Here we go!
Jump to a specific date:
March 19
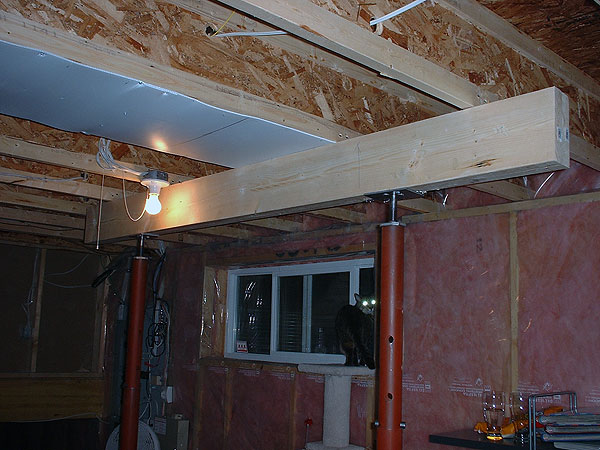
My first task was to brace my main floor which was to hold the aquarium. My tank will be a 48" x 18" x 18" with a false end/overflow that is 6" deep. This leaves me with appoximately 60 gallons of water in the display tank. The sump will be made of a 33 gallon I had kicking around and will hold maybe 15 gallons during normal operation. Normal operation excludes when the display floods into the sump! So, With about 75 gallons of water, my solidly constructed stand and canopy, my equipment and maybe 100 lbs of live rock eventually, the final system was likely going to weigh more than 1000 lbs. It will act as a room divider of sorts and will unfortunately run parallel to my floor joists. I like sleeping at night so I decided to beef up the flooring using two teleposts and a couple of 8 foot 2" x 8" beams nailed together. The results of this can be seen below. The teleposts were secured into the concrete slab with some nifty concrete screws I picked up at Home Depot.
Note: Prices are appoximate and in Canadian funds. Click on the thumbnails for a closer look.
My Re-enforced floor.
Costs:
Two 2" x 8" beams: $14
Two teleposts: $102
Total: $116 for no worries.
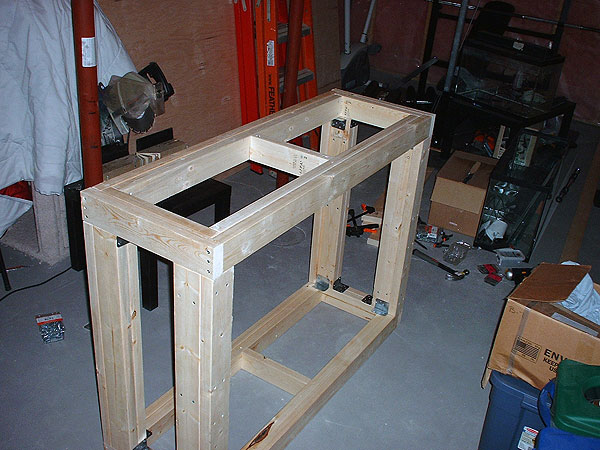
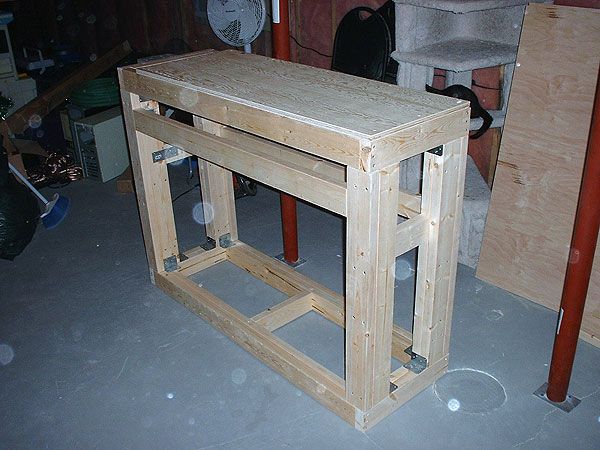
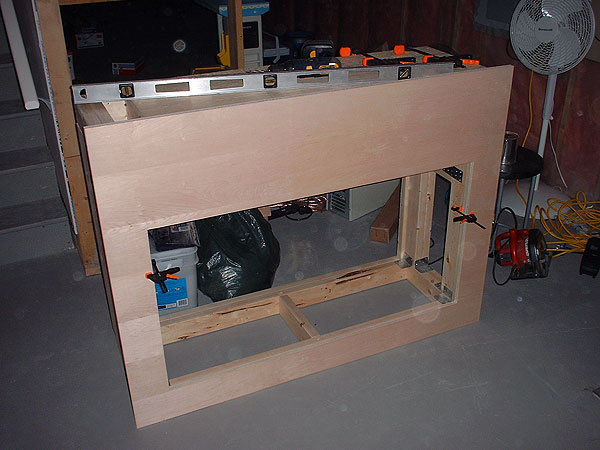
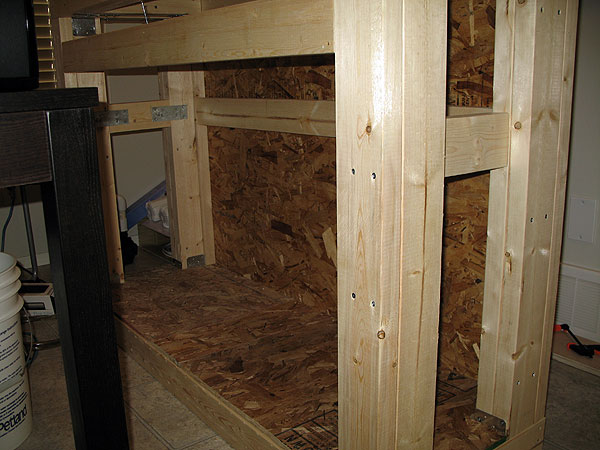
Next, I began work on the 2" x 4" stand. I plan to wrap this stand in a nice 3/4" Maple I picked up. I began by measuring and making all my cuts and then screwed everything together with 8" x 2 1/2" wood screws. In total I used about 300 of these screws. This photo shows how i interlocked this part of the stand.
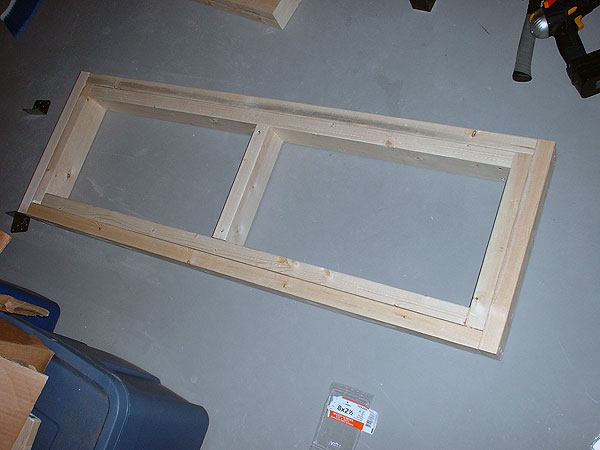
This picture shows the bottom frame completed. I also made an identical piece for the top of the stand.
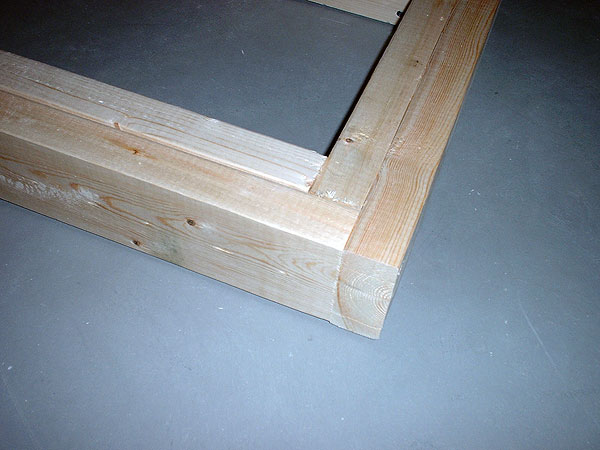
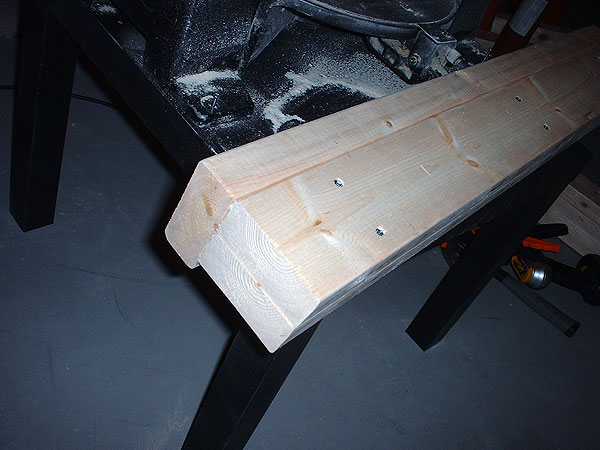
Here you can see the end of one of my legs. I first screwed two 2" x 4" pieces together and then attached a third perpendicular to these. The end result is a very sturdy leg. I made 4 of these bad-boys.
This shot shows the stand starting to take shape with the four legs secured to the matching top and bottom pieces.
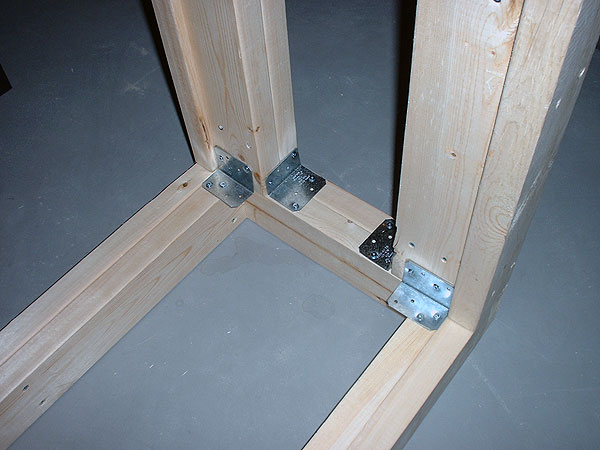
You can see here I used some metal brackets to join the legs to the top and bottom. I didn't want to start angling screws into the legs and felt this would give a much stronger joint. Home Depot was out of stock of narrower braces therefore there is some over-bite but I'm not too concerned as a floor will be installed for the sump, hiding these braces.
With the main pieces screwed together I added some extra bracing where I thought it would be useful. I carefully measured these extra pieces to be a very snug fit each time and used a hammer to put them in place. This really increased the stands performance during the strenuous tests I put it through. Tests involved basic wiggling, jumping and sitting on it and placing large animals on the stand.
This giant beast was tranquilized and then placed upon the stand prior to screwing the 3/4" plywood top down. Clearly the stand holds up nicely under this gravitational onslaught. I cut the piece of plywood using a Skill saw as my tool selection is limited. I did this by screwing down a nice straight piece of wood to my 3/4" plywood and using it as a guide for my saw. As I've stated, I have no woodworking experience so this may be an obvious step for some. Or, perhaps it's not even a wise choice. Either way, the cut was quite straight.
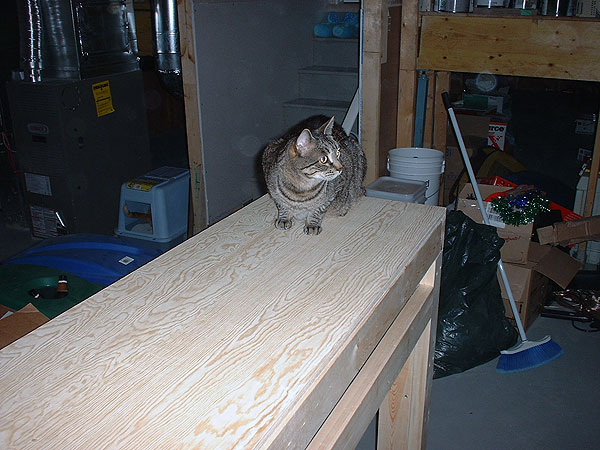
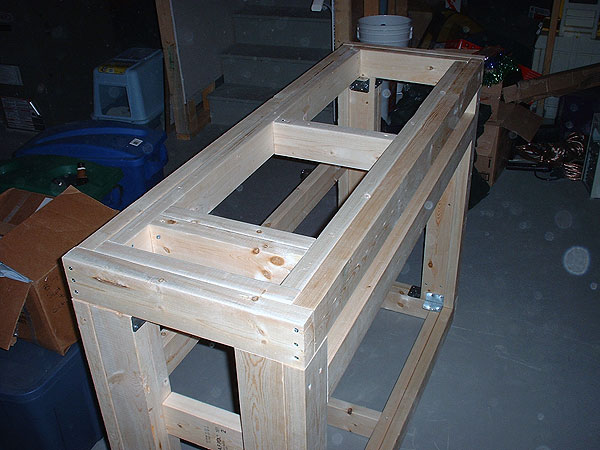
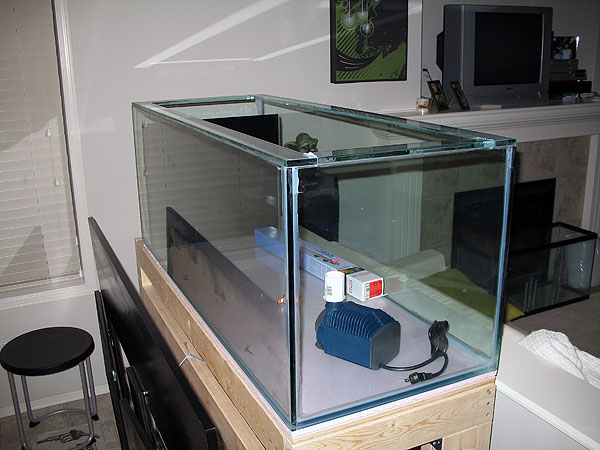
The top is secured in this photo and you can see a small gap at the end of the 48" plywood sheet. This is where my overflow drains into my sump and also where my return will pass through. My tank is drilled with two 1" bulkheads on the end piece of glass and I plan to install PVC elbows to head directly down through this gap. I don't have my tank yet so let's hope there's room. I guess I should hope it's even built to my specs as the stand is well underway!

Stand phase 1 is complete! Only took me around 12 hours to do and I'm really happy with it.
Costs:
Ten 10 foot 2" x 4" pieces of wood: $36
One 48" x 24" piece of 3/4" plywood: $25
300 screws (8 x 2 1/5"): $24
100 screws (6 x 1 1/2") $8
16 ninety degree metal brackets: $14
10 straight metal brackets: $4
Total: $111 for a beast of a stand
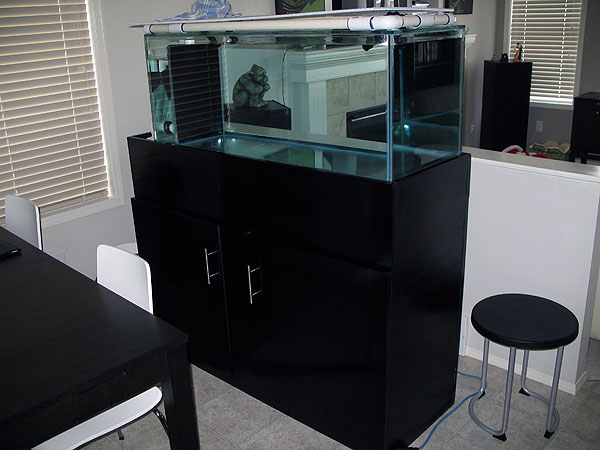
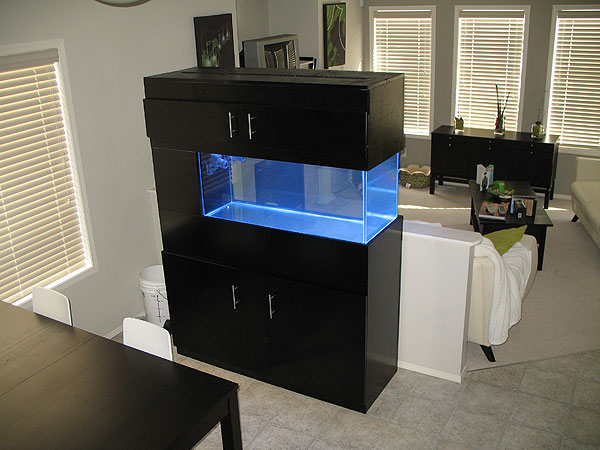
Here she is. You're looking at the front where I will install 2 giant doors allowing for total access. She stands just under 41" high and will make viewing easier for tall people like myself.
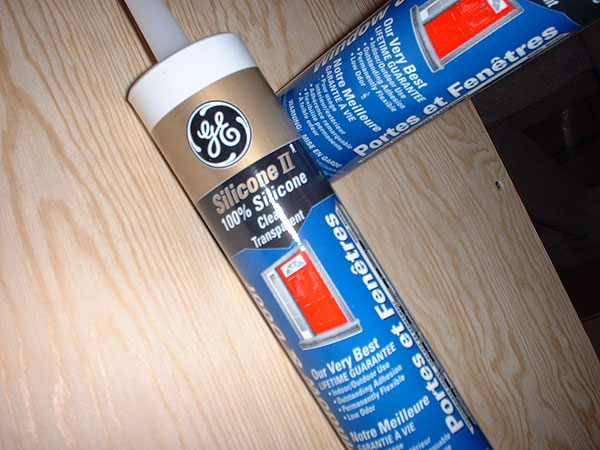
I also picked up a few other things. This is the silicone I'll be using to install baffles and more into the 33 gallon sump. After a lot of reading, I discovered that this readily available product is safe for aquarium use. For legal reasons, GE has said on the label that it is not however many people are using it (including tank builders) with great success. This is GE Silicone II Glass and Windows. Be sure to not use the Kitchen and Bath version as it contains mildew resistant agents which are harmful to your aquarium inhabitants.
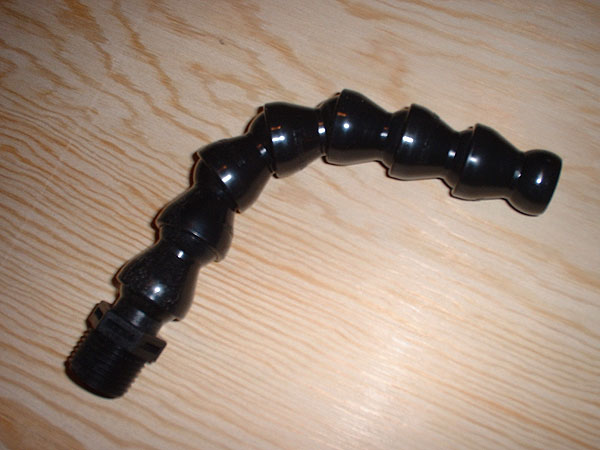
I also managed to find some Loc-line locally which was a rare find. I'll be using 6 of these 1/2" bendable pipes to return water back into the tank. The threaded ends are purchased seperately but will be required to connect to my 1" PVC lines above the display tank.
Costs:
6 pieces of Loc-line: $57
5 threaded adapters (Only 5 in stock): $18
Total: $75
Finally, here are 2 fun shots to conclude this day of construction. The first is of my team of strength testers. Here they can be seen attempting escape through my basement window.
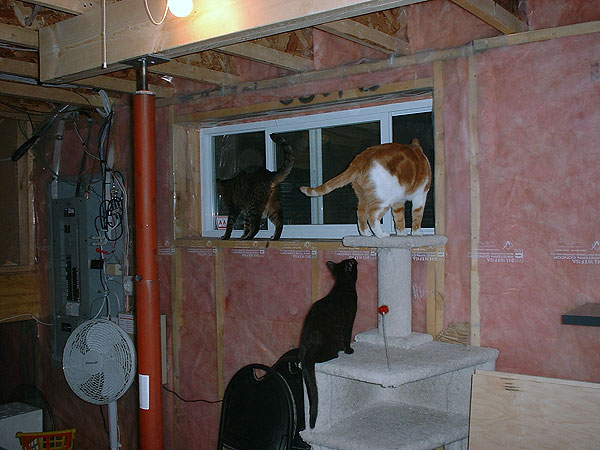
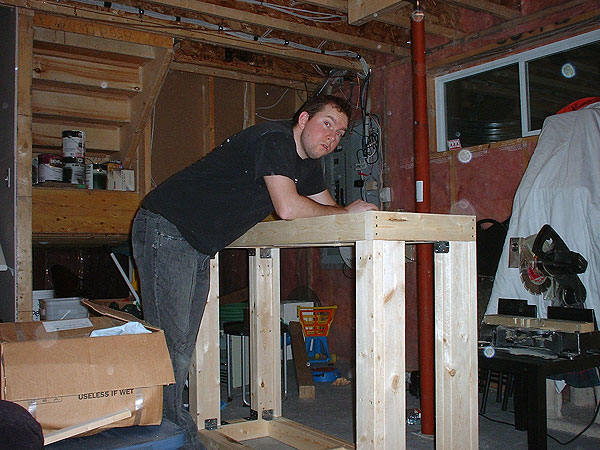
I strike a silly pose during the construction of the stand but I really shouldn't. Now off to bed!
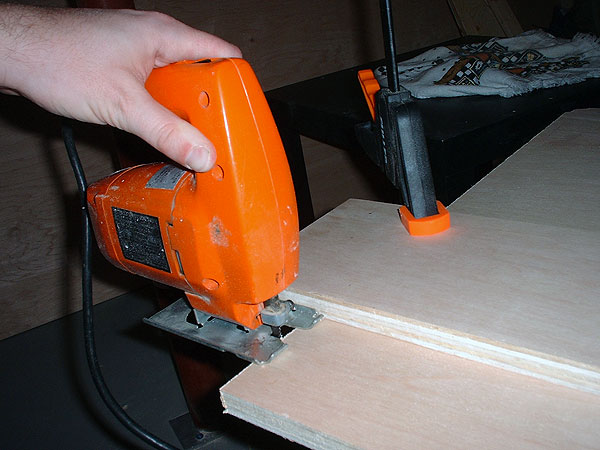
Tonight I tried my luck with the jigsaw. I wanted to cut the front of my stand out in one solid piece so I wouldn't have to worry about sloppy seams. To make the cuts I would first drill some holes in my corners and then go to town with the jigsaw. To ensure a relatively straight line I clamped a straight piece of wood to my 4' x 8' sheet to act as a guide for the jigsaw. This seemed to work really well. Ignore the wimpy hand-hold pictured below. It's hard to shoot the pic and hold the jigsaw at the same time!
To clean up the corners I fiddled with a coping saw as best I could. Be careful with these things. If you're careless they can really bite into your wood in a hurry and ruin any chance of a square corner! I'll be cleaning the edges and corners up a bit better when I buy some more sanding blocks. I can't recommend those enough!

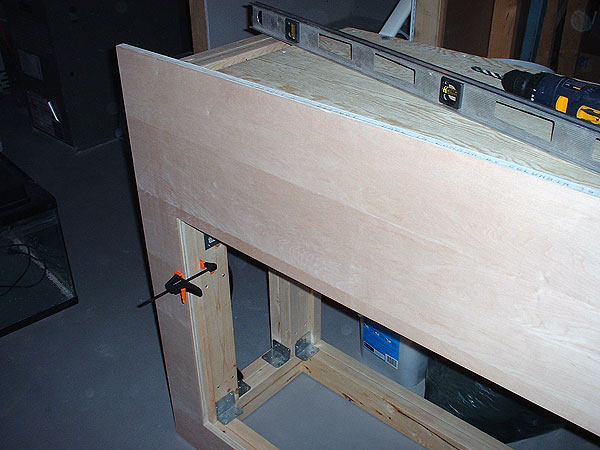
Here's a detail of the upper left corner. The 3/4" maple extends past the top of the 3/4" plywood top by a little more than an inch to hide a 1/2" piece of foam and the bottom silicone edge of the tank. I only have it clamped for pictures.
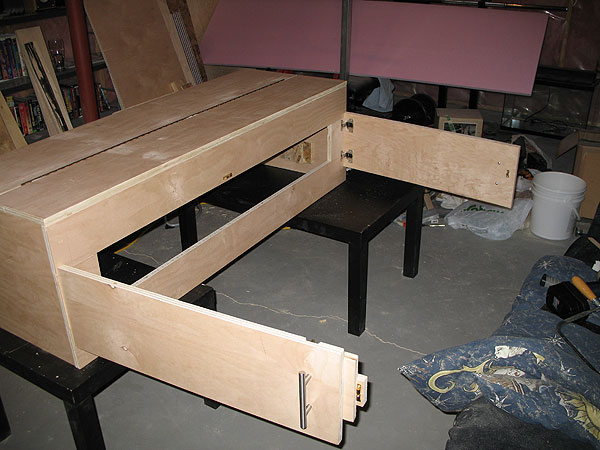
Here's a nice shot of the whole front panel. I will be cutting two large doors to cover the gap. This will allow me a ton of space to work under the stand when the doors are open. I haven't sorted out what type of hinges to use just yet though.
Costs:
Two 4' x 8' sheets of 3/4" maple: $110
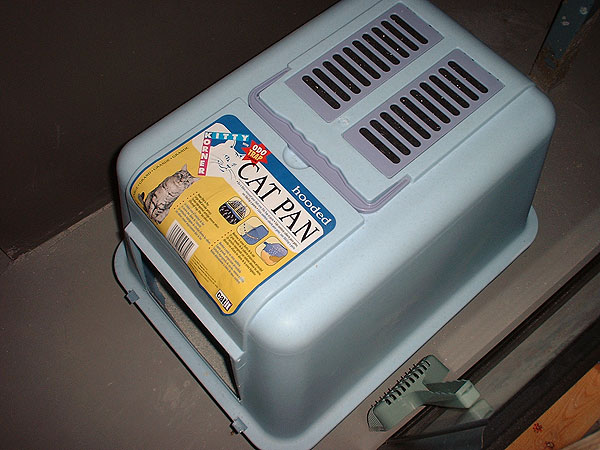
Final shot for tonight. If ever I needed motivation to throw down cash for a garage it's this box sitting next to the stairs. I'm not sure who it was, but my last 10 minutes down there tonight were less than pleasant. And I thought sawdust in the air was a problem! Anyways, tomorrow I hope to cut me some stand ends. Good night.
Been crazy busy dealing with the death of my computer and my car. I've taken care of the later this past weekend. His name is Pedro and he is fast. As far as the tank goes, I'm totally losing track of all the little costs but there are many and they add up way too fast. One such minor expense is this maple veneer. Matches my wood perfectly and irons right on! It doesn't take stain too well but I'm hoping my clear coat seals the deal.

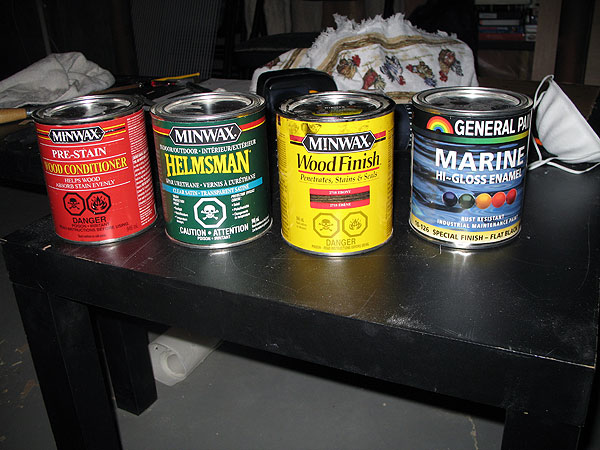
Speaking of clear-coat...here's a quick show of the products I'm using. From left to right we have a pre-coat, clear-coat, and ebony stain from Minwax. On the far right is a marine enamel I used to protect the 2 x 4 stand and the backs of the maple plywood.
Here's a picture during the staining process. In total I've applied 5 coats to these pieces and 4 on the ends. It's got a nice piano-black look to it.
Before protecting the 2x 4's I made a floor, ends and rear out of 3/4" plywood.
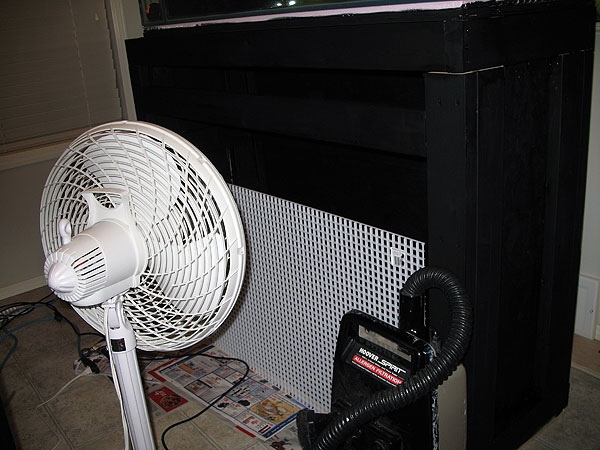
Next I brushed the black marine enamel on. The eggcrate serves to keep three curious cats out of the stand while it dries.
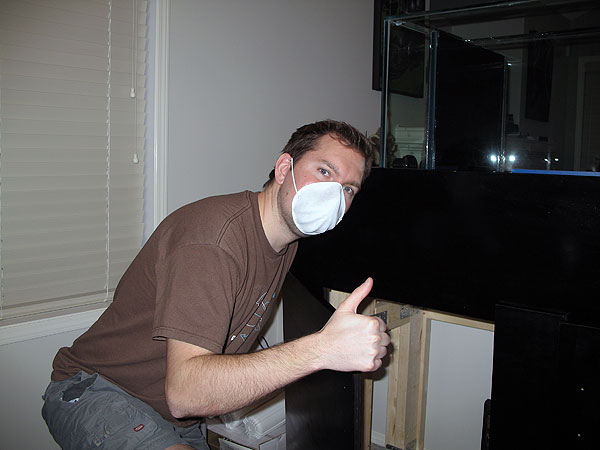
Always wear proper sars-resistant paint-huffing filters! Here I am giving the wife my thumbs up. She's been pretty tolerant as I fumigate the house each night.
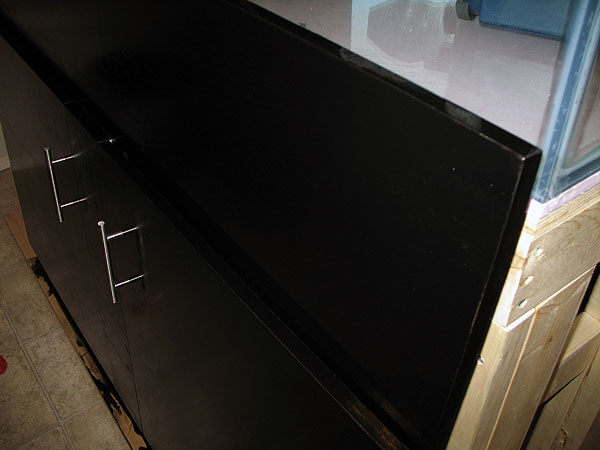
Here's a closer look at the doors and handles.
The sump is an old 33 gallon I had sitting in the basement. The baffles after the return/skimmer compartment are pieces I cut from two 10 gallon tanks I cut apart. My silicone work is totally brutal but I wasn't too concerned. I just used a finger and went to town! The left third is where the water enters from the tanks two 1- 1/4" overflows before entering a few baffles designed to slow the water and allow bubbles to dissipate. This area will also hold my skimmer once I pick it up. The middle section is where the heater (Ebo Jager), return pump (Quiet One 6000), and Kent Marine auto-topoff float will reside. The last third is the refugium. It's angled to allow room for my heater on its side.
Here's the RO/DI unit I bought. It's an Aqua Safe 100 GPD unit. I'll eventually plumb it into my washing machine feed in the basement and feed the auto-topoff valve through a cold-air return behind the tank. I didn't want to put it under my sink and run it under my floor and back up.

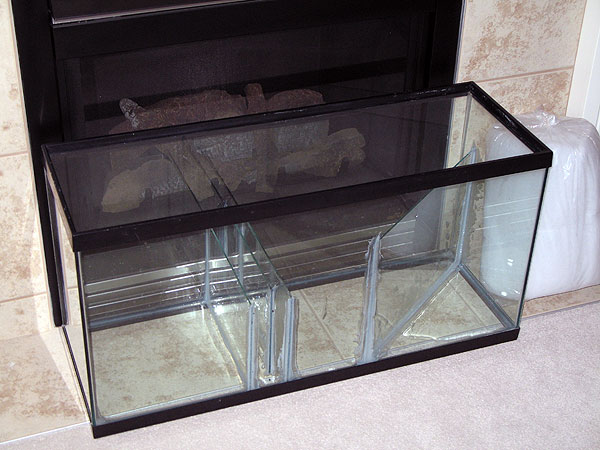
Now for some shots of the tank itself. It's outer dimension are 48" long, 18" wide and high. The tank has eurobracing on top. The overflow area is 6" deep and has a black acrylic front. I designed the overflow this way because I dislike the look of corner overflows and this allows for 18" of surface skimming.
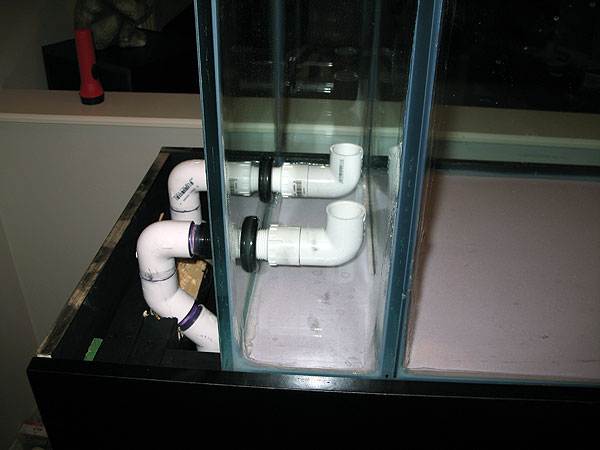
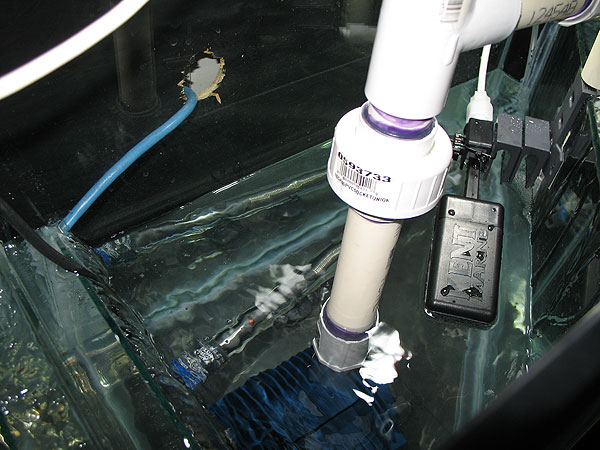
Here's the two 1 - 1/4" bulkheads installed.

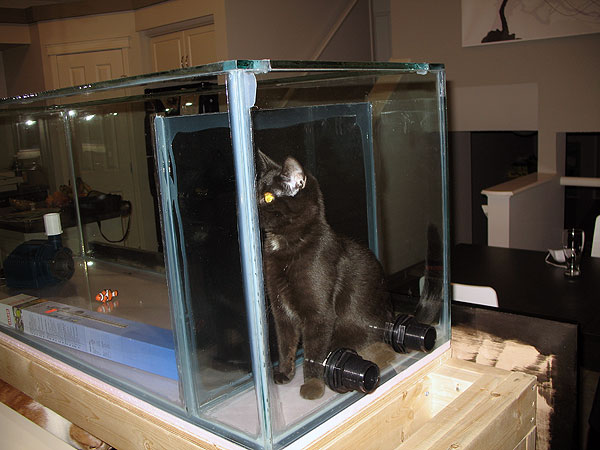
Some stress-test analysis by Sammy.
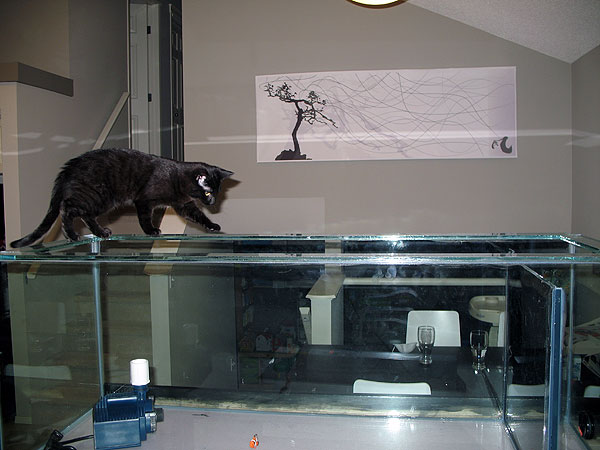
Sammy ensuring that the overflow is large enough. I swear she did this all on her own!
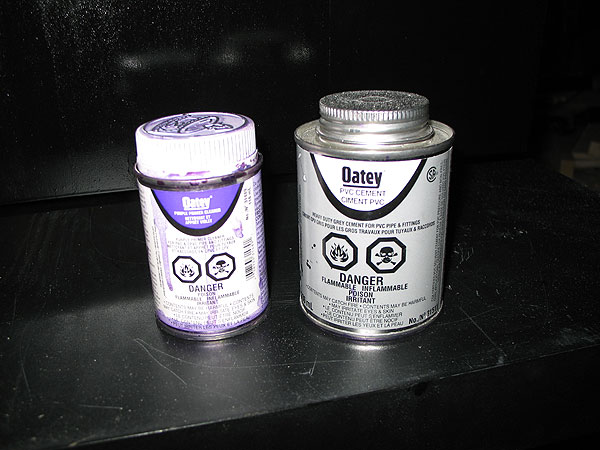
To prime and glue my PVC I used the following.
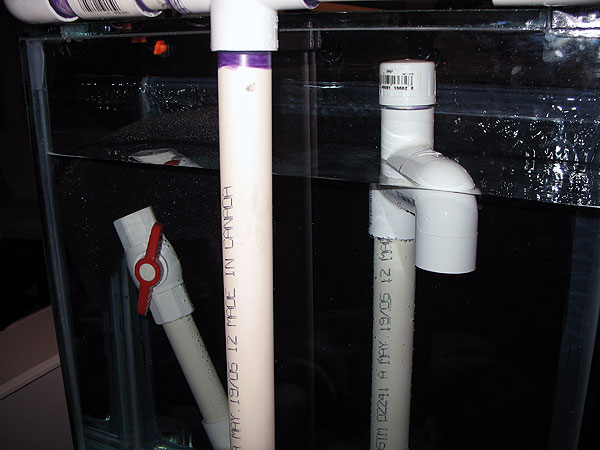
The overflows partially plumbed. All pipe is 1".
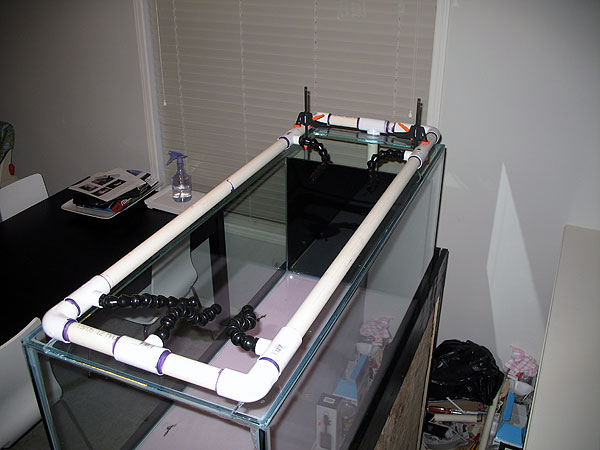
The return and loc-line ring that sits atop the tank.

Overhead shot of the return ring and five 1/2" loc-line nozzles.
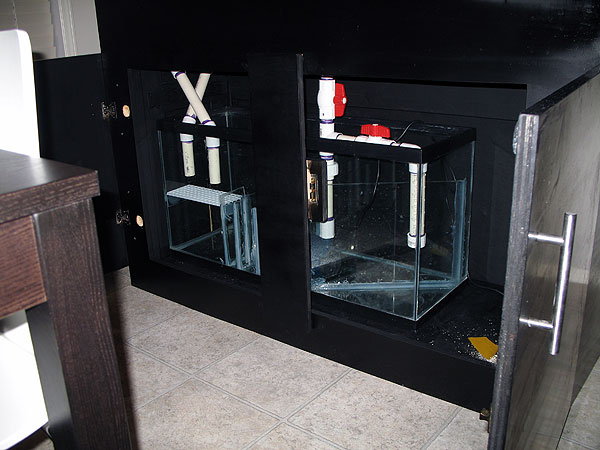
Inside the stand before ignition. Notice the drip tray I installed in the return area to hold some filter foam. The criss-crossed pipes on the left carry water from the tank and water leaves into both the refugium and tank through the ball valves. Only a small amount is allowed to enter the refugium, creating ideal slow water for all the pods and creatures that will flourish there.
A pic of the water test! I removed the filter foam as it couldn't handle the incoming water without a lot of noise. Instead the water enters through submerged pipes. There is tons of air entering the two durso standpipes I made and this was very loud.
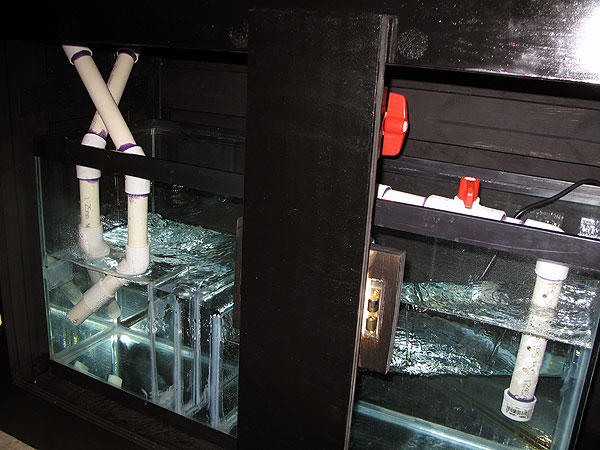
To kill much of the air and noise I made this modification. One straight-pipe is restricted by a ball valve and one durso remains. By adjusting flow through the straight-pipe, I can keep the water level just above it. This way, the pipe draws only water which is very quiet. The durso draws whatever flow that the straight-pipe cannot handle. After I made this mod I could hear my pump and water in the sump. I'll tackle that noise soon!
Here we see my progress to date with the pump running. I've had it in operation for three days now to ensure there are no leaks and the durso/straight-pipe combo function flawlessly. I have simulated a power failure several times and the sump easily handles the overflow that siphons through the loc-line. I have my trusty sheet of eggcrate on top to thwart the cats' efforts to take a bath.
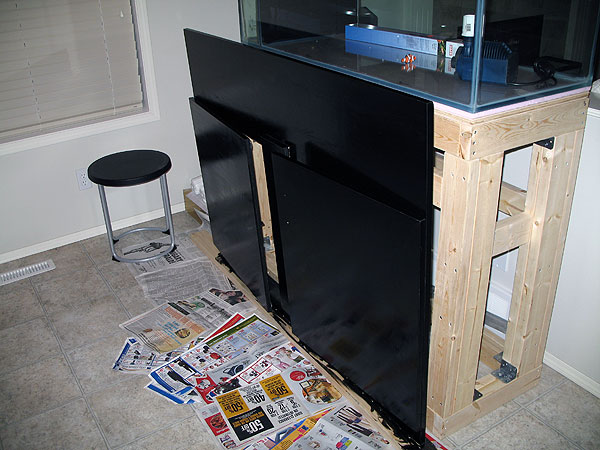
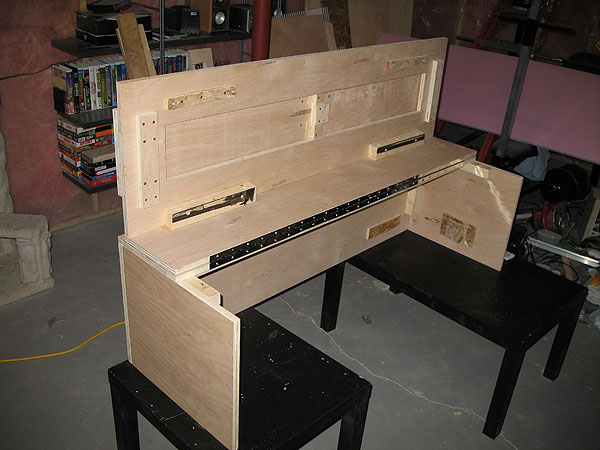
Haven't updated for some time so here goes another big update. Below you can see the canopy i made. Really simple and not as square in some places as I'd like. In the future I just have to buy a table saw. Maybe for the next tank! In this pic the entire front is swung upwards. My front opening is only 6 inches tall for feeding etc so I wanted a way to really get in there which I'm sure I'll need to quite often.
Here's a shot of the front doors with handles and ball-bearing latch mechanisms.
View with the canopy fully open. You can see my 250W 14k mounted and very eager to fire up. I'll be shifting this one over when I get a second 14k bulb soon. The inside of the canopy was painted with the same marine enamel I used on the stand's guts, but in white to reflect as much light as possible back into the tank.

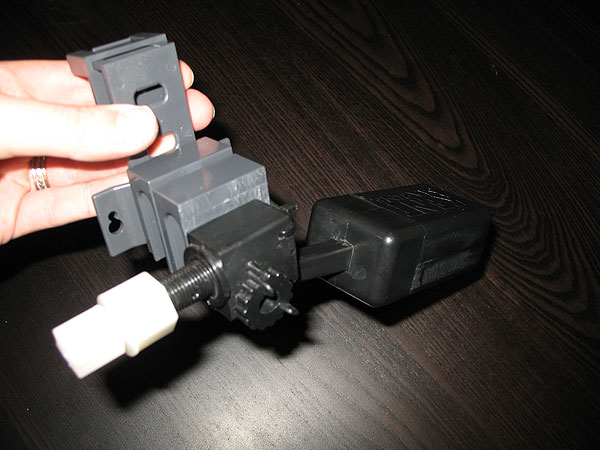
My home-made auto-topoff mounting bracket. I had some leftover mounts from my Seio 820's so I put them to good use here. I drilled a few holes, threw some silicone onto the bracket and tie-wrapped the float valve to the mount. Now It can simply hang on the refugium wall into the return chamber in my sump!
Looking down on valve inside the stand. My trusty Ebo working hard in its trial run. You can see my elegant hole for the power feed. I'm an idiot so I drilled it AFTER the sump was in the stand and totally trapped inside it by my door divider. It was very careful drilling! I plan to install a drip tray between the baffles and the return area so I can throw some filter floss in there. My baffles worked great before but currently my tank is full of micro bubbles. Perhaps the skimmer running just stirs things up too much? A gentle reminder to anyone hooking up their RO/DI for the first time: remember that there will be waste water in addition to the filtered water! I pressurized my unit and was already nervous having plumbed into my washing machine feed. Well, the unit started shooting water out of some empty connector and I nearly fell off the washing machine i was kneeling on! Then I recalled the drain line and promptly attached it. Doh!
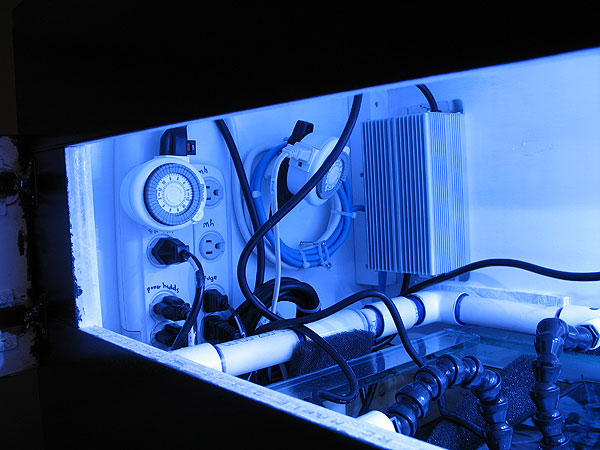
Pretty in blue! Here's my power strip with the ballast next to it. Damn timers take up so much space!
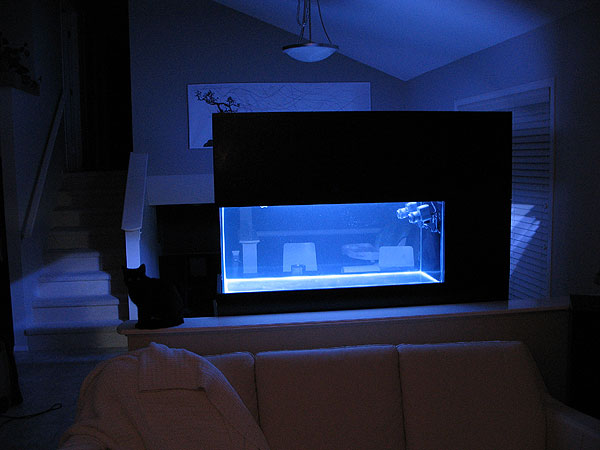
A picture with the lights on in and outside the tank. I still need to add a second clear-coat to the canopy.
Looks like some sort of glowing beast doesn't it? The light inside the stand is a clip-on reflector with a Philips "daylight" bulb for the fuge. It's 6500k to simulate natural sunlight and is on a timer to turn on at night.
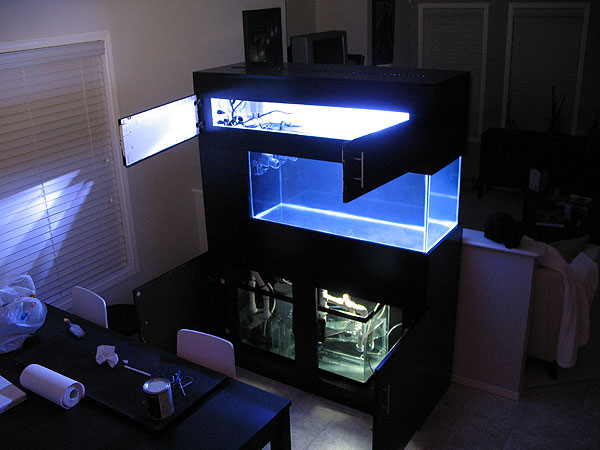
Looking through the tank from the livingroom. That's it for this update. I'm getting closer! I'm having so much fun I've forgotten all about fish and corals!